Cheesy Root Vegetable Gratin

Imagine coming home on a chilly autumn evening to the irresistible aroma of bubbling cheese and roasted root vegetables filling your kitchen. That’s the magic of Cheesy Root Vegetable Gratin— a comforting dish that transforms simple veggies into something utterly indulgent. I’ve made this Cheesy Root Vegetable Gratin countless times for family gatherings, and it never fails to wow everyone with its creamy, golden layers.
In my experience, what sets this Cheesy Root Vegetable Gratin apart is how it brings out the natural sweetness of roots like carrots and parsnips, all blanketed in a rich cheese sauce. If you’re tired of the same old side dishes, this easy Cheesy Root Vegetable Gratin is your new go-to. Let’s dive into the recipe and get you started on creating your own version tonight.
And if you love hearty comforts like this, check out our easy carrot cake with cream cheese frosting for a sweet twist using some of those same root veggies, or try the best carrot cake recipe to round out your meal.
Grab This Chef Knife Now - Almost Gone!

- Stays Razor-Sharp: Ice-hardened blade keeps its edge longer than ordinary knives
- Superior Grip Control: Unique finger hole design gives you perfect balance and safety
- Built to Last a Lifetime: Premium stainless steel blade with elegant beech wood handle
- ✓ Finally, a knife that stays sharp and feels comfortable in my hand
- ✓ Professional quality without the premium price tag
- ✓ Makes meal prep faster and more enjoyable
⏰ Only a few items left in stock - order soon
Key Takeaways:
- Cheesy Root Vegetable Gratin is a cozy, crowd-pleasing side that highlights seasonal produce for ultimate comfort.
- Prep and bake in under 90 minutes for a quick yet impressive holiday dish.
- Rich, melty cheese pairs perfectly with earthy roots for bold, savory flavors.
- Slice veggies thinly for even cooking and maximum sauce absorption.
- Store leftovers in the fridge for up to 4 days; reheat for a delicious next-day meal.
Why You’ll Adore This Cheesy Root Vegetable Gratin
Ultimate Comfort Food: There’s nothing quite like the warm, gooey embrace of a well-made gratin on a cold day. This Cheesy Root Vegetable Gratin delivers that hug in every bite, with tender veggies swimming in a velvety cheese sauce. I promise, once you try it, it’ll become a staple in your rotation.
Versatile for Any Occasion: Whether it’s a casual weeknight dinner or a festive holiday spread, this dish fits right in. It’s hearty enough to stand alone but shines as a side. Let’s be honest, who can resist pulling a fork through those crispy, cheesy edges?
Nutrient-Packed Goodness: Loaded with vitamins from colorful roots, this Cheesy Root Vegetable Gratin sneaks in health benefits without sacrificing taste. In my experience, it’s a sneaky way to get picky eaters to love their veggies. Plus, the cheese makes it feel like a treat.
Easy to Customize: Feel free to swap in your favorite roots or add a protein kick. What I find interesting is how forgiving it is— even beginners nail it on the first try. You’ll be hooked after one golden, bubbly pan.
Grab This Kitchen Scale Now — Best Precision Pick!

- Razor-Accurate Every Time: Dual-increment precision down to 0.1g — perfect for baking, meal prep, and portion control with g, oz, ml, and fl'oz modes.
- Smart Removable Bowl Design: Detachable bowl doubles as a protective case for compact storage. Tare function lets you weigh ingredients in any container with zero fuss.
- Built for Everyday Convenience: Auto-zero, tare function, low battery alert, overload indicator, and 2-minute auto-off to extend battery life — all in a sleek stainless steel build.
- ✓ "Perfect for baking — precise, lightweight, and stores easily without wasting counter space"
- ✓ "A game changer! Weighing ingredients is now way more accurate than measuring cups"
- ✓ "Love the 0.1g precision and backlight — best food scale I've owned. Highly recommend!"
⏰ Only a few items left in stock - order soon
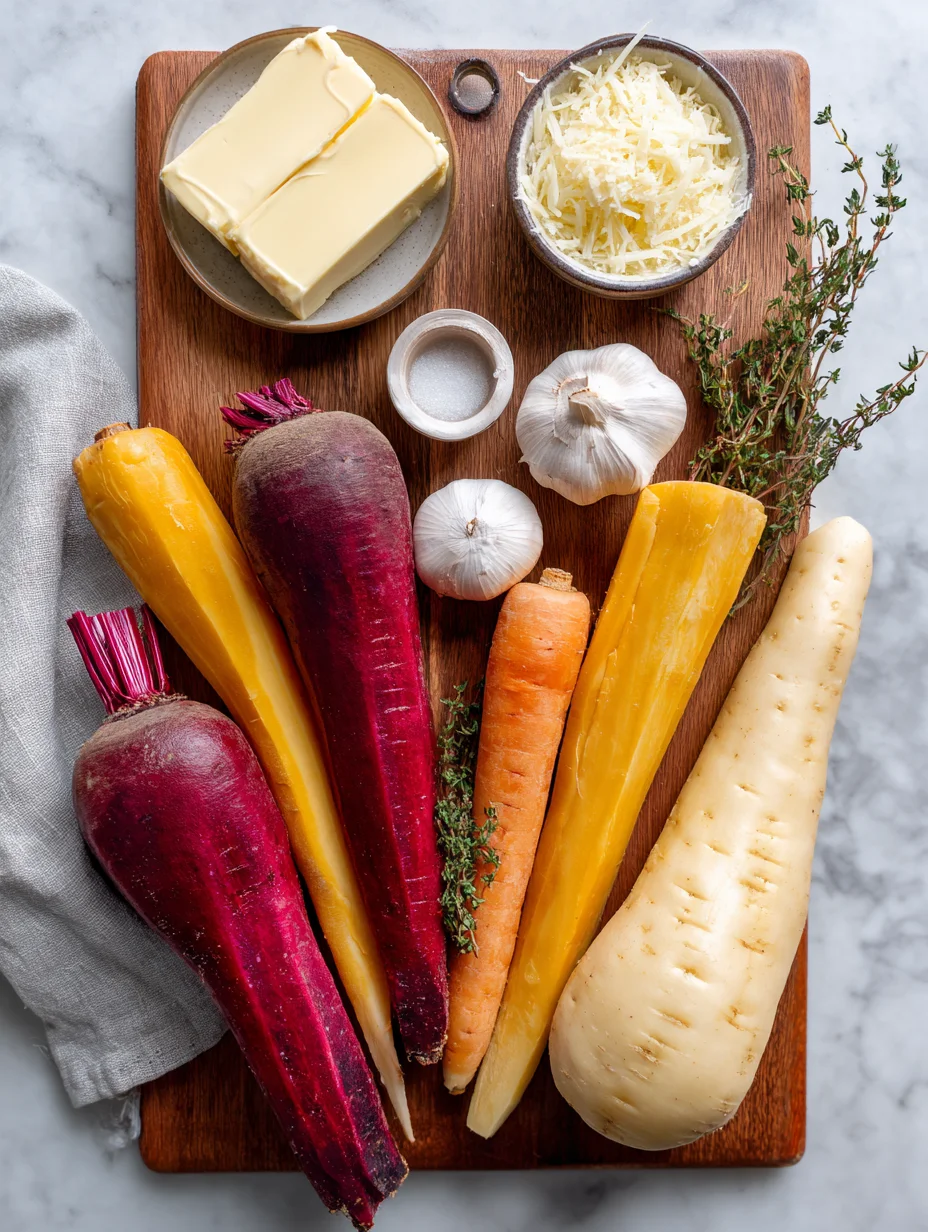
Essential Ingredients for Cheesy Root Vegetable Gratin
Root Vegetables (Potatoes, Carrots, Parsnips): These form the hearty base of your Cheesy Root Vegetable Gratin, providing texture and natural sweetness when roasted. I always use a mix for variety— potatoes for creaminess, carrots for color, and parsnips for that subtle nutty flavor. Slicing them thinly ensures they cook evenly and soak up all the cheesy goodness.
Heavy Cream and Milk: The creamy duo that ties everything together in a luxurious sauce. Heavy cream adds richness, while milk lightens it up just enough to avoid heaviness. In my kitchen, this combo is key to achieving that silky texture without curdling under the oven’s heat.
Gruyere and Cheddar Cheese: The stars of the show in this Cheesy Root Vegetable Gratin, melting into a golden, bubbly topping. Gruyere brings a nutty depth, while cheddar adds sharpness— together, they’re unbeatable. Grate it fresh for the best melt; pre-shredded just doesn’t compare in smoothness.
How to Make Cheesy Root Vegetable Gratin
Prep the Vegetables
Start by gathering your root veggies and giving them a good wash before peeling and slicing them thinly— about 1/8-inch thick works best for this Cheesy Root Vegetable Gratin. I use a mandoline for speed and uniformity, but a sharp knife does the trick too. Toss the slices in a bowl with a bit of salt and olive oil to draw out moisture and prevent sogginess. This step sets the foundation for layers that hold their shape while absorbing flavors beautifully.
Assemble the Layers
Preheat your oven to 375°F and grease a baking dish generously with butter. Layer the sliced veggies alternately in the dish, sprinkling each layer with minced garlic, thyme, and a handful of shredded cheese for that signature Cheesy Root Vegetable Gratin vibe. Pour the cream mixture over the top slowly, ensuring it seeps into every crevice— the aroma alone will have you hungry. It’s therapeutic watching those colors stack up, promising a rainbow of tastes.
Bake to Perfection
Cover the dish with foil and bake for 45 minutes, then uncover and add the remaining cheese for a crispy top. Let it go another 20-25 minutes until bubbly and golden— keep an eye on it to avoid burning those cheesy peaks. In my experience, resting it for 10 minutes post-oven lets the flavors meld even more in this Cheesy Root Vegetable Gratin. Serve it hot for the best melt-in-your-mouth experience.
For more baking inspiration, check out our easy homemade biscuits recipe to pair alongside.
Ingredients
- 2 large potatoes, thinly sliced
- 3 carrots, thinly sliced
- 2 parsnips, thinly sliced
- 1 onion, thinly sliced
- 2 cloves garlic, minced
- 1 cup heavy cream
- 1 cup whole milk
- 2 cups shredded Gruyere cheese
- 1 cup shredded cheddar cheese
- 2 tbsp butter, for greasing
- 1 tsp fresh thyme, chopped
- Salt and pepper to taste
- 1/4 cup breadcrumbs (optional for topping)
Cheesy Root Vegetable Gratin Instructions
- Preheat oven to 375°F (190°C). Grease a 9×13-inch baking dish with butter.
- Slice all root vegetables and onion thinly. In a large bowl, toss with garlic, thyme, salt, and pepper.
- Layer vegetables in the dish, alternating types and sprinkling cheese between layers.
- Whisk cream and milk together with a pinch of salt; pour over the vegetables.
- Cover with foil and bake for 45 minutes. Uncover, top with remaining cheese and breadcrumbs if using.
- Bake uncovered for 20-25 minutes until golden and bubbly. Let rest 10 minutes before serving.

Pro Tips for the Best Cheesy Root Vegetable Gratin
Uniform Slicing: Use a mandoline for even slices to ensure your Cheesy Root Vegetable Gratin cooks uniformly— no one wants crunchy spots.
Cheese Freshness: Grate cheese straight from the block for superior melting in this dish; it makes a world of difference.
Oven Positioning: Bake on the middle rack to get that perfect golden crust without over-browning the top of your Cheesy Root Vegetable Gratin.
You Must Know
- This Cheesy Root Vegetable Gratin is naturally gluten-free if you skip breadcrumbs.
- Root veggies release starch during baking, thickening the sauce naturally—no flour needed.
- It’s vegan-adaptable with dairy-free cheese and cream alternatives.
- Portion control is key; one serving packs a cheesy punch that’s hard to resist.
How to Store Cheesy Root Vegetable Gratin
Once cooled, cover your Cheesy Root Vegetable Gratin tightly with plastic wrap or transfer to an airtight container; it keeps in the fridge for up to 4 days. For longer storage, freeze portions in freezer-safe bags for up to 2 months. Reheat in a 350°F oven until warmed through to revive that creamy texture— microwaving works but might make it watery. I’ve found a quick broil at the end crisps up the top nicely for leftovers.
Customizing Your Cheesy Root Vegetable Gratin
Swap in sweet potatoes for extra sweetness or add beets for a vibrant twist in your Cheesy Root Vegetable Gratin. If dairy’s an issue, plant-based cheeses work wonders without losing creaminess. For a meaty version, layer in cooked bacon or ham— it’s endlessly adaptable. Experiment with herbs like rosemary for a fresh spin, and if you’re feeling adventurous, try our coffee cake cookies as a sweet contrast on the side.
What to Serve with Cheesy Root Vegetable Gratin
Pair this hearty Cheesy Root Vegetable Gratin with roasted chicken or a juicy steak for a cozy dinner. A crisp green salad with vinaigrette cuts through the richness perfectly. Don’t forget crusty bread to sop up any extra sauce, and a glass of Chardonnay complements the cheesy notes beautifully. In my experience, it’s also great with grilled sausages for a casual barbecue vibe.

Cheesy Root Vegetable Gratin
This beautiful Cheesy Root Vegetable Gratin is as beautiful as it is tasty. Sweet Potatoes, beets, and parsnips with cream and garlic baked to perfection. We love this side dish for special occasions like Thanksgiving.
Timing
Recipe Details
Ingredients
- 01 1 tablespoon unsalted butter (softened)
- 02 1-2 long sweet potatoes (about 2 inches thick, peeled)
- 03 3-4 large parsnips (ends trimmed and peeled)
- 04 3-5 small beets (peeled)
- 05 14 tablespoons heavy cream (divided (whole milk is fine, but mixture won't thicken as much or be as creamy))
- 06 4 ounces grated Parmesan (divided)
- 07 1 tablespoon fresh minced thyme (divided (plus more for garnish))
- 08 1 garlic clove (minced)
- 09 1 ounce shredded gruyere
- 10 salt and pepper (to taste)
Instructions
Preheat oven to 400˚F. Grease a 3 quart baking dish with butter.
Slice sweet potato, parsnips and beets into very thin rounds (using a mandoline is easiest) and transfer each vegetable to its own bowl.
Pour 4 tablespoons cream over each sweet potatoes and parsnips, and 2 tablespoons cream over beets. Top each bowl of sliced vegetables with ½ ounce grated Parmesan and 1 teaspoon minced thyme. Season each bowl generously with salt and pepper and toss together until all vegetable slices are well coated.
Pour remaining 1/4 cup cream into the bottom of a 3 quart (oval) baking dish and sprinkle with ½ ounce of Parmesan and minced garlic.
Grab a stack of sweet potatoes and line them standing up on a bias, at the top of the baking dish. Follow the sweet potato with a row of parsnips, followed by a row of beets. Repeat with the remaining sweet potatoes, parsnips and beets, creating 6 rows of root vegetables.
Season top of gratin with salt, pepper and sprinkle of remaining Parmesan.
Cover with foil and bake for 30 minutes or until vegetables are soft.
Uncover gratin and top with shredded gruyere.
Place gratin back into oven, uncovered, and continue to bake for an additional 18 to 20 minutes or until vegetables are fork tender, cheese has melted and the top has lightly browned.
Finish with a sprinkle of fresh thyme leaves. Serve.
FILED UNDER:
NUTRITION FACTS (PER SERVING)
Nutrition information is calculated using an ingredient database and should be considered an estimate. In cases where multiple ingredient alternatives are given, the first listed is calculated for nutrition. Garnishes and optional ingredients are not included.
Frequently Asked Questions About Cheesy Root Vegetable Gratin
Can I make Cheesy Root Vegetable Gratin ahead of time?
Absolutely, assemble it up to a day in advance and store covered in the fridge. Bake just before serving for the freshest taste. This makes it ideal for holiday prep when time is tight.
How long does Cheesy Root Vegetable Gratin last in the fridge?
Your Cheesy Root Vegetable Gratin stays good for 3-4 days when stored properly in an airtight container. Beyond that, the texture might soften too much. Always reheat to at least 165°F for safety.
Is Cheesy Root Vegetable Gratin vegetarian?
Yes, this recipe is fully vegetarian as is, relying on cheese and cream for flavor. It’s a great option for meat-free meals. Add nuts for extra crunch if desired.
Can I use different cheeses in Cheesy Root Vegetable Gratin?
Definitely— experiment with fontina or gouda for a milder twist, or amp up with blue cheese for boldness in your Cheesy Root Vegetable Gratin. The key is a good melting cheese. For more dairy ideas, see our raspberry cheesecake no-bake recipe.
What if I don’t have fresh herbs for the recipe?
Dried herbs work fine; use half the amount since they’re more potent. Thyme is forgiving in this dish. Fresh is best, but don’t let it stop you from making it.
How do I make Cheesy Root Vegetable Gratin vegan?
Substitute with vegan cheese and coconut cream for the sauce in your Cheesy Root Vegetable Gratin— it mimics the richness surprisingly well. Nutritional yeast adds that cheesy umami. Test a small batch first for melt.
Can kids eat Cheesy Root Vegetable Gratin?
Yes, most kids love the cheesy comfort, though some might pick around veggies. Hide them in fun shapes or puree a bit. It’s a sneaky way to boost their veggie intake.
Why is my Cheesy Root Vegetable Gratin watery?
It could be from thick veggie slices releasing too much moisture— slice thinner next time. Also, pat slices dry before layering. Baking uncovered longer helps evaporate excess liquid for a firmer Cheesy Root Vegetable Gratin. For similar tips, check our easy moist banana bread recipe.
Final Thoughts
From the first bubbly bite to the last cheesy scrape of the dish, this Cheesy Root Vegetable Gratin is pure winter bliss wrapped in simplicity. I’ve shared it with friends who now request it every gathering, and I bet it’ll become your signature too. Whip it up soon and let me know how yours turns out— happy cooking!